The trick to framing a cylindrical deck is providing a sound structural foundation while also making sure every cut end of the decking is fully supported. That takes planning and, inevitably, reworking things until you have it right. Screw fasteners help. If you have to revise your framing, it is easy to back out fasteners and start again.
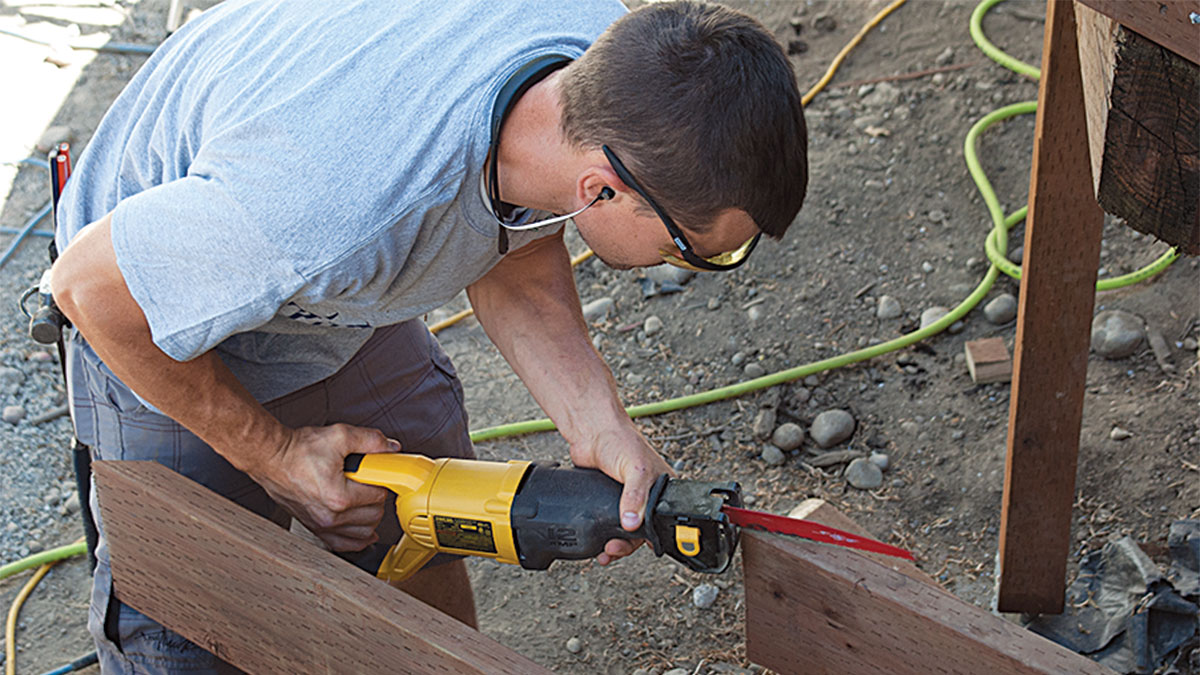
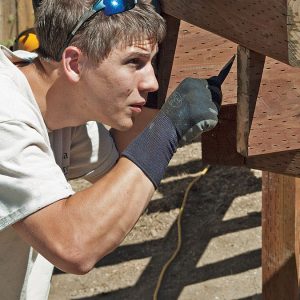
Cutting the joists to a radius means making a multitude of angled cuts. A conventional 90-degree cut is the shortest distance from one side of a board to the other. Vary from 90 degrees and you have a lot more wood to cut through—a sharp angle can be like cutting through an 8-in. beam. Such angles aren’t possible with the 7-1/4-in. blade on most circular saws. Instead, pros use an electric chainsaw (see step 3). Amateurs often find a reciprocating saw less intimidating, although slower.
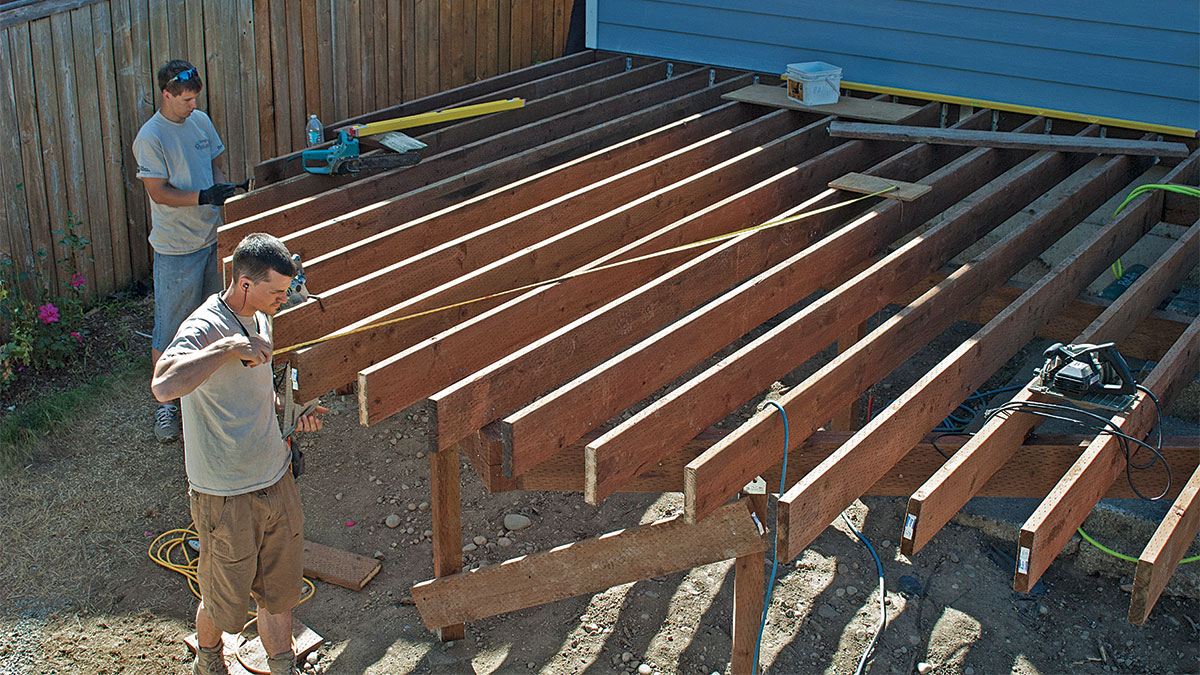
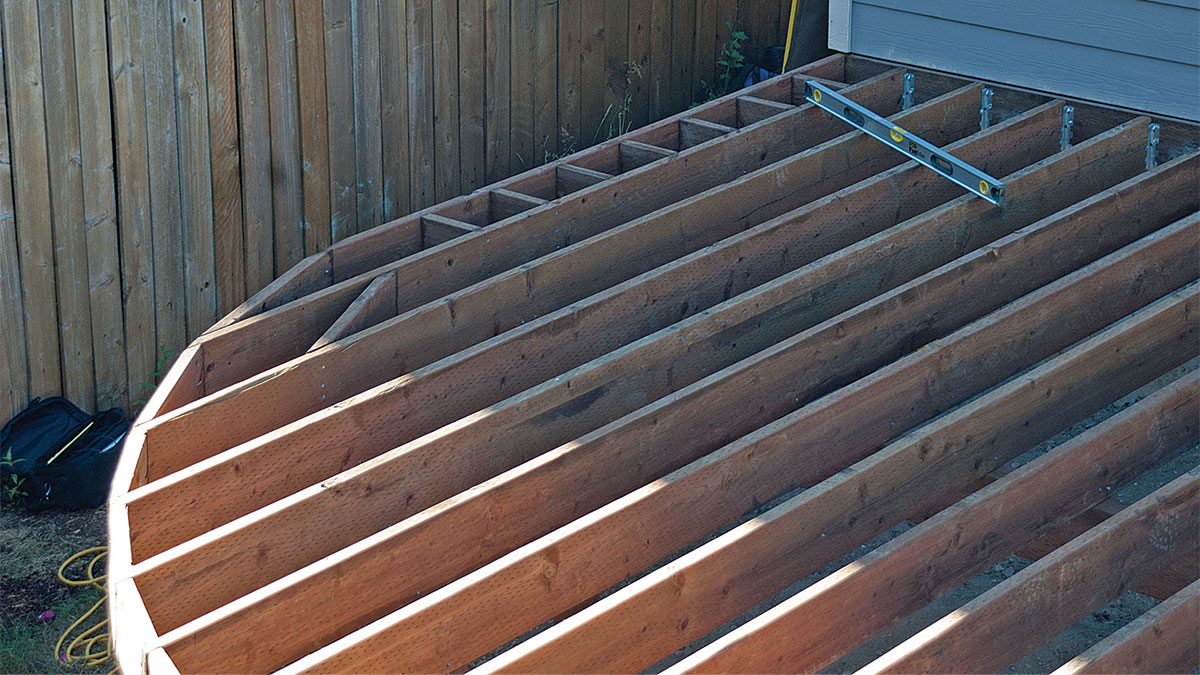
Blocking between the joists is a slow process of marking, cutting, checking, and recutting. It takes careful planning to locate the blocking so it provides support where needed but is covered by decking to avoid possible rot pockets.
Post, beam, and ledger installation is much like any deck. It is when the joists go on that the fun begins. Here’s how to install joists and blocking on a radius deck.
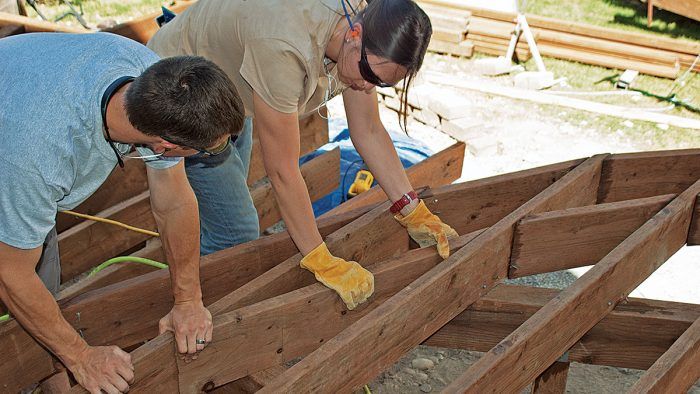
1. Mark the radius. With the footings, posts, beams, and ledgers in place, install the joists. Let each joist run wild. A scrap of plywood attached to the joists provides a stable base for marking the centerpoint. By hooking a tape measure onto a deck screw drilled into the centerpoint, each joist can be marked with the proper angle for cutting.
 2. Trim the joists. When the angle is not too severe, some cuts can be made with a circular saw. 2. Trim the joists. When the angle is not too severe, some cuts can be made with a circular saw. | 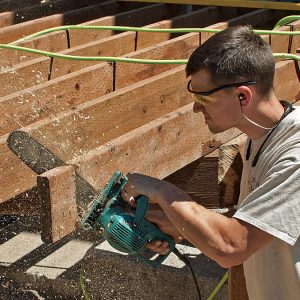 3. Make angled cuts with a chain saw. Sharp angles call for cuts beyond the ability of a circular saw. An electric chainsaw does the job quickly and, with practice, makes a surprisingly accurate cut. 3. Make angled cuts with a chain saw. Sharp angles call for cuts beyond the ability of a circular saw. An electric chainsaw does the job quickly and, with practice, makes a surprisingly accurate cut. |
 4. Mark the blocking. Perimeter blocking stabilizes the joists, provides a nailing surface for the picture-frame edging that wraps each level, and supports the skirting. Holding each piece in place and marking as shown is much more accurate than attempting to measure each piece. 4. Mark the blocking. Perimeter blocking stabilizes the joists, provides a nailing surface for the picture-frame edging that wraps each level, and supports the skirting. Holding each piece in place and marking as shown is much more accurate than attempting to measure each piece. |  5. Test-fit the blocking. It can be tough to cut the blocking right the first time. Test-fit each piece so it is tight but not too tight. 5. Test-fit the blocking. It can be tough to cut the blocking right the first time. Test-fit each piece so it is tight but not too tight. |
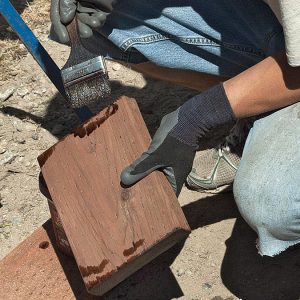 6. Coat cut the edges. Once you are satisfied with the fit, coat all cut edges with preservative. 6. Coat cut the edges. Once you are satisfied with the fit, coat all cut edges with preservative. | 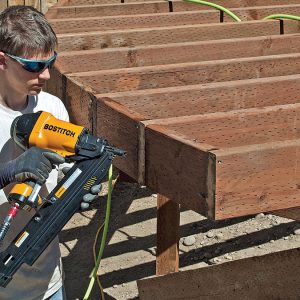 7. Fasten the blocking. Fasten the blocking by nailing through the joist and into the blocking where you have a clear shot and toenailing (as shown) where the previous block is in the way. 7. Fasten the blocking. Fasten the blocking by nailing through the joist and into the blocking where you have a clear shot and toenailing (as shown) where the previous block is in the way. |
 8. Begin the second course of blocking. The edge of this deck will be finished with two bent pieces of decking. To provide an adequate nailing surface, a second course of blocking is needed. Cut and fasten the blocking along the straight edge of the deck. 8. Begin the second course of blocking. The edge of this deck will be finished with two bent pieces of decking. To provide an adequate nailing surface, a second course of blocking is needed. Cut and fasten the blocking along the straight edge of the deck. | 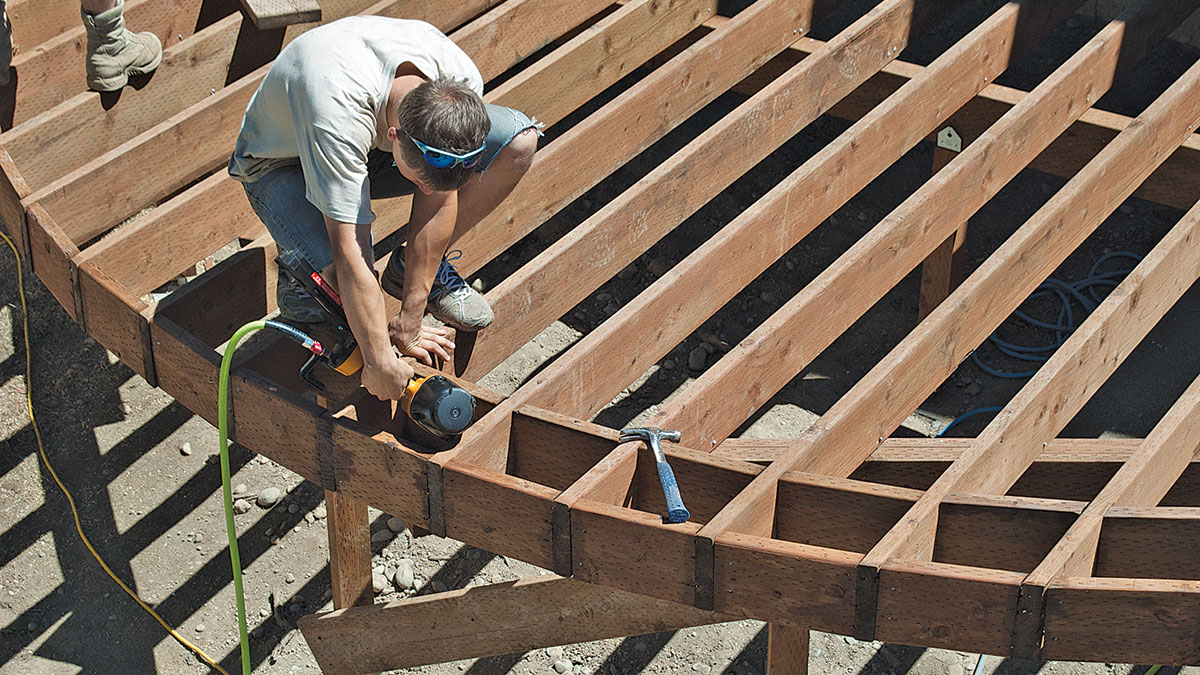 9. Continue the second course of blocking. Measure, allowing for the two courses of bent decking, a 3/8-in. gap and a 3/4-in. overhang beyond the skirting. Position the blocking so it will be completely covered by the decking. 9. Continue the second course of blocking. Measure, allowing for the two courses of bent decking, a 3/8-in. gap and a 3/4-in. overhang beyond the skirting. Position the blocking so it will be completely covered by the decking. |

10. Prepare for mega-blocking. Some of the blocking will seem to be almost joist length and call for very acute angle cuts. These are the pieces that take some finesse to get right. Complete the blocking on both levels of the deck.
Fine Homebuilding Recommended Products
Flashing and Joist Tape
Flashing joists is a great way to prolong the life of a deck frame — after all, moisture management is key to longevity.
Angel Guard Deck Demon
Demo has never been easier with the deck demon. The tool keeps the worker in an upright position and uses leverage to remove decking from framing, a must have tool for demo.
Standard Marking Chalk
We like white chalk because it’s non-permanent and wears off easily — this is especially helpful when marks are exposed and need to disappear.
MicroFoam Nitrile Coated Work Gloves
These gloves are comfortable and have a good grip, making for splinter-free work.Drill Driver/Impact Driver
Whether you're pre-drilling holes or driving screws, this Milwaukee® compact cordless driver is the way to go when it comes to building decks.
Sign up for eletters today and get the latest how-to from Fine Homebuilding, plus special offers.