The following also applies to the Wireless Subwoofer (PS-WK360).
TO REDUCE THE RISK OF ELECTRIC SHOCK, DO NOT REMOVE THE COVER (OR BACK).
NO USER-SERVICEABLE PARTS ARE INSIDE. REFER SERVICING TO QUALIFIED SERVICE PERSONNEL.

| This symbol indicates that high voltage is present inside. It is dangerous to make any kind of contact with any internal part of this product. | |
| This symbol indicates that this product comes with important literature concerning operation and maintenance. | |
 | Class II product: This symbol indicates that a safety connection to electrical earth (ground) is not required. |
 | AC voltage: Rated voltage marked with this symbol is AC voltage. |
 | DC voltage: Rated voltage marked with this symbol is DC voltage. |
 | Caution. Consult Instructions for use: This symbol instructs the user to consult the user manual for further safety related information. |
FCC NOTE (for U.S.A):
Class B FCC Statement
The included module(s) has been tested and found to comply with the limits for a Class B digital device, pursuant to Part 15 of the FCC Rules. These limits are designed to provide reasonable protection against harmful interference in a residential installation. This equipment generates, uses and can radiate radio frequency energy and, if not installed and used in accordance with the instructions, may cause harmful interference to radio communications. However, there is no guarantee that interference will not occur in a particular installation. If this equipment does cause harmful interference to radio or television reception, which can be determined by turning the equipment off and on, the user is encouraged to try to correct the interference by one of the following measures:
FCC Radiation Exposure Statement:
This equipment complies with FCC radiation exposure limits set forth for an uncontrolled environment.
This equipment should be installed and operated with minimum distance 20cm between the radiator & your body. This device and its antenna(s) must not be co-located or operation in conjunction with any other antenna or transmitter.
FCC Caution:
Read these operating instructions carefully before using the unit. Follow all the safety instructions listed below. Keep these operating instructions handy for future reference.

CALIFORNIA USA ONLY
This perchlorate warning applies only to primary CR (Manganese Dioxide)
Lithium coin cells in the product sold or distributed ONLY in California USA
"Perchlorate Material - special handling may apply,
See www.dtsc.ca.gov/hazardouswaste/perchlorate."
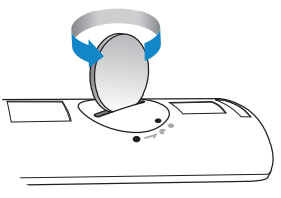
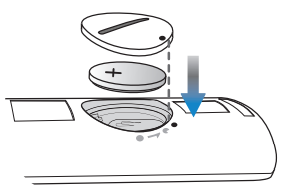
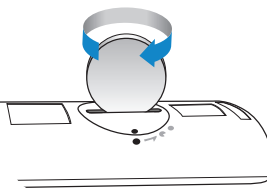
DO NOT INGEST BATTERY. CHEMICAL BURN HAZARD.
The remote control supplied with this product contains a coin/button cell battery. If the coin/button cell battery is swallowed, it can cause severe internal burns in just 2 hours and can lead to death. Keep new and used batteries away from children. If the battery compartment does not close securely, stop using the remote and make sure to keep it away from children. If you think the battery might have been swallowed or placed inside any part of the body, seek immediate medical attention.
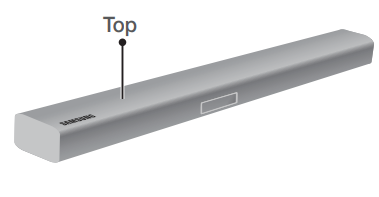
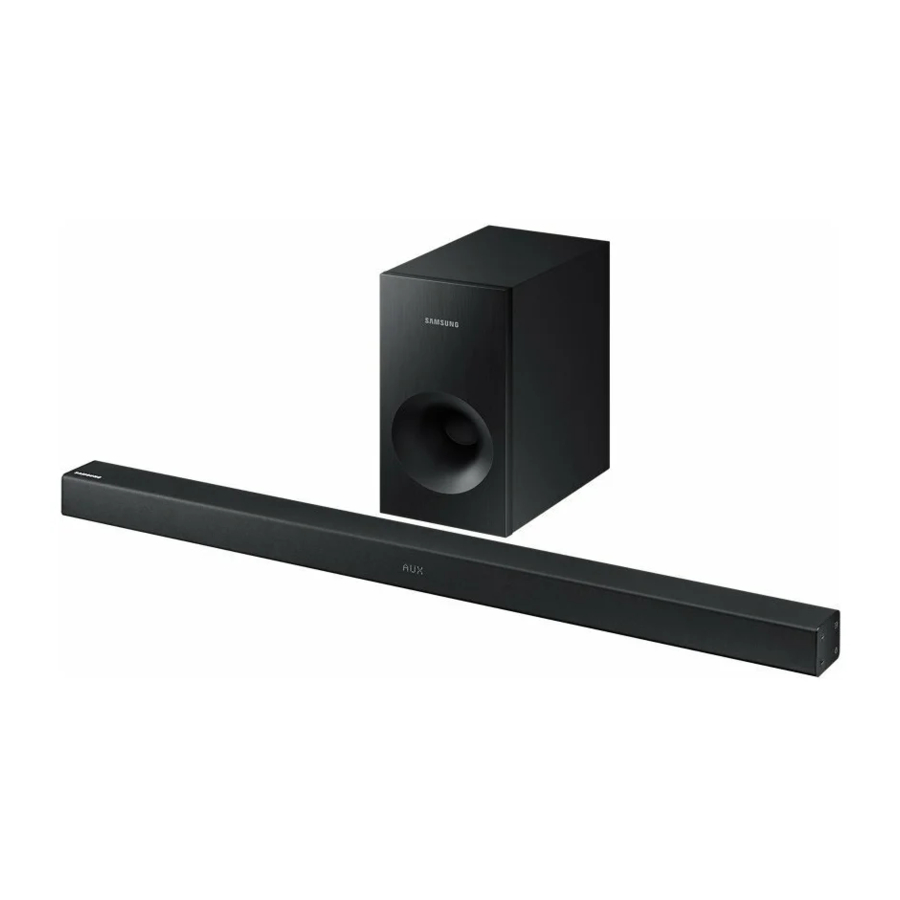
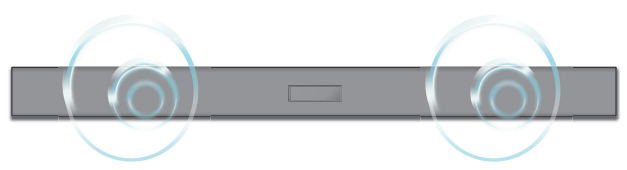
Main Unit
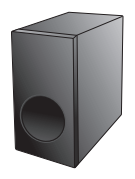
Subwoofer
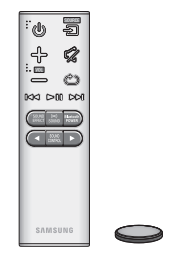
Remote Control/Battery

Optical Cable
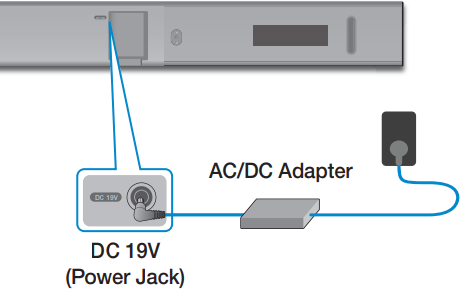
Use the following accessories to connect the Soundbar to electrical power.
| Main Unit | Subwoofer | ||
 | 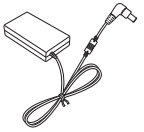 |  |  |
| Power Cord | AC/DC Adapter | Power Cord | AC/DC Adapter |
 |  | ||
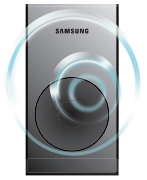
You can enjoy rich bass tones and better sound quality by linking the subwoofer to the main unit.
Main Unit
Subwoofer
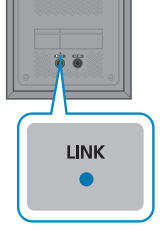
The main unit and subwoofer should link (connect wirelessly) automatically when the main unit and subwoofer are turned on. When auto-connection is complete, the blue indicator on the rear of the subwoofer stops blinking and glows blue continuously. The subwoofer's LED indicator modes are listed below:
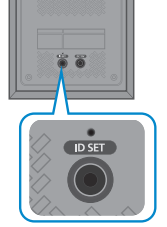
 button on your remote control for 5 seconds while the main unit is turned OFF.
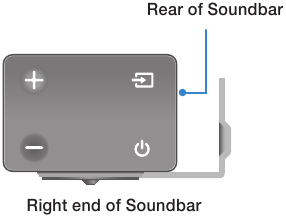
 button on your remote control or on the right side of the main unit to turn on the main unit.
Expand to true wireless surround sound by connecting the Samsung Wireless Rear Speaker Kit (SWA-8000S) to your Soundbar. (Sold separately)
You can enjoy TV sound after connecting the Soundbar to your TV with or without a cable.
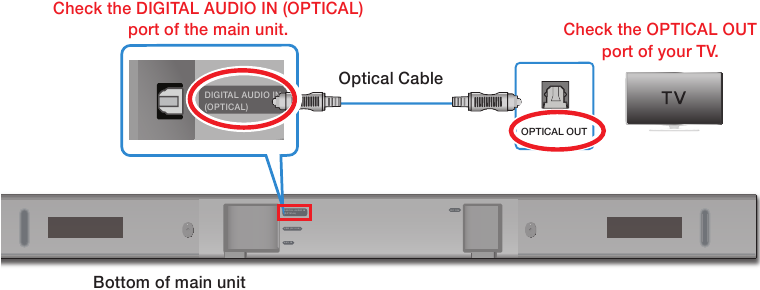
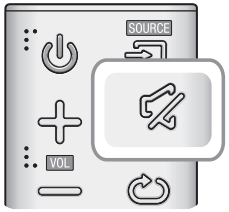
 button on the right side of the Soundbar or the SOURCE button on the remote control to select the D.IN mode.
  button on the right side of the Soundbar or the SOURCE button on your remote control. (Modes are displayed in the following order: D.IN → AUX → BT → TV → USB.)

 button on your remote control for more than 5 seconds.
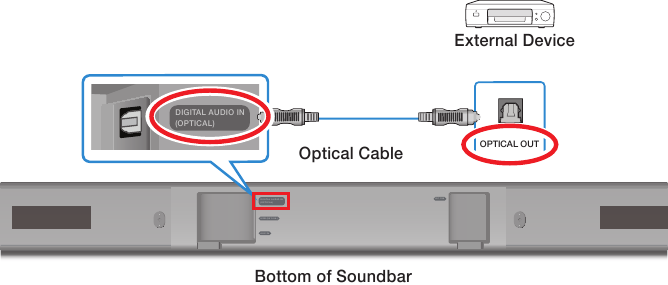
You can enjoy sound from separate external devices such as a BD player/game console/set-top box, etc. by connecting them to your Soundbar.
You can play music files located on USB storage devices through the Soundbar.
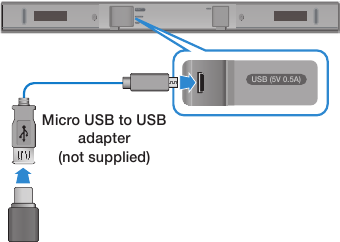
USB port

Display
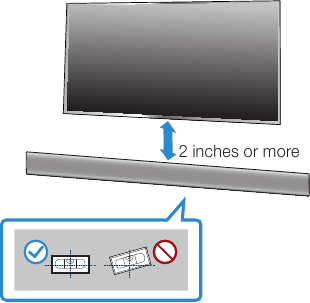
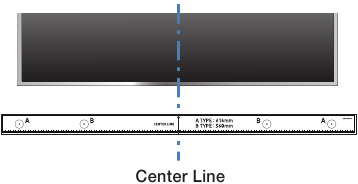
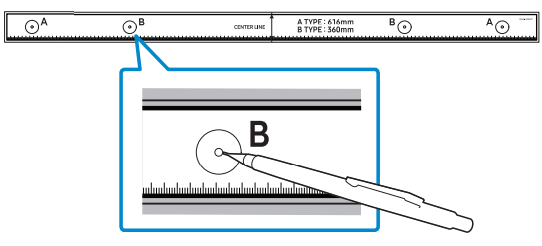
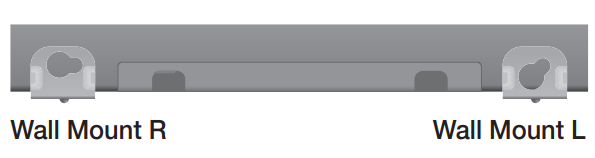
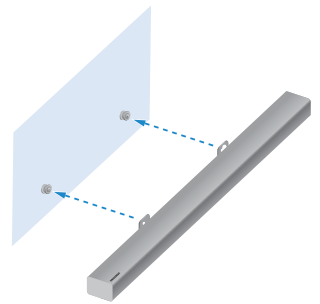
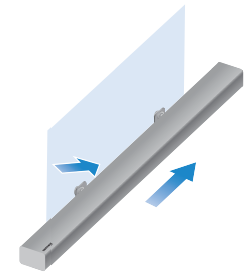
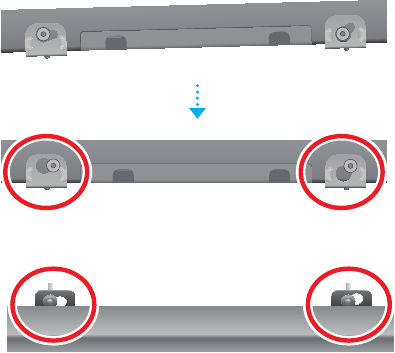
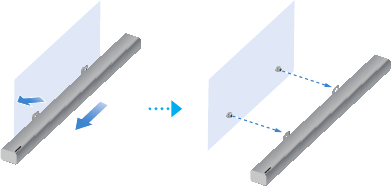
You can use the wall mount bracket to mount this unit on a wall.
Accessories for Wall-mounting
 (Wall Mount L) |  (Wall Mount R) |
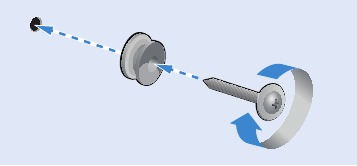
| Bracket-Wall Mount (2 EA) | |
 Holder-Screw (2 EA) |  Screw (2 EA) |
 | |
| Wall Mount Guide | |

Before seeking assistance, check the following.
The unit will not turn on.
Is the power cord plugged into the outlet?
Connect the power plug to the outlet.
A function does not work when the button is pressed.
Is there static electricity in the air?
Disconnect the power plug and connect it again.

Sound is not produced.
Is the Mute function on?
Press the (Mute) button to cancel the function.
Is the volume set to minimum?
Adjust the Volume.
The remote control does not work.
Are the batteries drained?
Replace with new batteries.
Is the distance between the remote control and main unit too far?
Move closer to the unit.
The TV SoundConnect (TV pairing) failed.
Does your TV support TV SoundConnect?
TV SoundConnect is supported by some Samsung TVs released from 2012 on. Check your TV to see if it supports TV SoundConnect.
Is your TV firmware the latest version?
Update your TV with the latest firmware.
Does an error occur when connecting?
Contact the Samsung Call Center.
Reset the TV mode and connect again.
Press and hold the button for 5 seconds to reset the TV SoundConnect connection.
The blue indicator on the rear of the subwoofer is not lit and the subwoofer is not producing sound.
Is the main unit power on?
Check the power cord. If the power cord is plugged in correctly, check the main unit. If your main unit is off (in standby mode), the subwoofer will also be in standby mode and the blue LED won't be lit.
Your subwoofer may not be connected to the main unit of the product.
Try to connect your subwoofer again.

Manufactured under license from Dolby Laboratories. Dolby, Dolby Audio, Pro Logic, and the double-D symbol are trademarks of Dolby Laboratories.

For DTS patents, see http://patents.dts.com. Manufactured under license from DTS Licensing Limited. DTS, the Symbol, DTS in combination with the Symbol, and DTS 2.0 Channel are registered trademarks or trademarks of DTS, Inc. in the United States and/or other countries. © DTS, Inc. All Rights Reserved.
To send inquiries and requests regarding open sources, contact Samsung via Email (oss.request@samsung.com).
| GENERAL | USB | 5 V / 0.5 A | |
| Weight | Main Unit | 3.3 lbs (1.5 Kg) | |
| Subwoofer (PS-WK360) | 6.4 lbs (2.9 Kg) | ||
| Dimensions (W x H x D) | Main Unit | 35.7 x 2.1 x 2.8 inches (907.5 x 53.5 x 70.5 mm) | |
| Subwoofer (PS-WK360) | 6.1 x 11.8 x 11.5 inches (155.0 x 300.0 x 293.0 mm) | ||
| Operating Temperature Range | +41°F to +95°F | ||
| Operating Humidity Range | 10% to 75 % | ||
| AMPLIFIER | Rated Output Power | Main Unit | 35 W/CH x 2, 6 ohm, THD=10%, 1 kHz |
| Subwoofer (PS-WK360) | 60 W, 3 ohm, THD=10%, 100 Hz | ||
| S/N Ratio (Analog Input) | 65 dB | ||
| Separation (1kHz) | 65 dB | ||
| Supported play formats (DTS 2.0 sound is played in DTS format.) | LPCM 2ch, Dolby Audio™ (supporting Dolby® Digital), DTS | ||
This SAMSUNG brand product, as supplied and distributed by SAMSUNG and delivered new, in the original carton to the original consumer purchaser, is warranted by SAMSUNG against manufacturing defects in materials and workmanship for a limited warranty period of:
One (1) Year Parts and Labor* (*90 Days Parts and Labor for Commercial Use)
This limited warranty begins on the original date of purchase, and is valid only on products purchased and used in the United States. To receive warranty service, the purchaser must contact SAMSUNG for problem determination and service procedures. Warranty service can only be performed by a SAMSUNG authorized service center. The original dated bill of sale must be presented upon request as proof of purchase to SAMSUNG or SAMSUNG's authorized service center. Transportation of the product to and from the service center is the responsibility of the purchaser.
SAMSUNG will repair or replace this product, at our option and at no charge as stipulated herein, with new or reconditioned parts or products if found to be defective during the limited warranty period specified above. All replaced parts and products become the property of SAMSUNG and must be returned to SAMSUNG. Replacement parts and products assume the remaining original warranty, or ninety (90) days, whichever is longer.
SAMSUNG's obligations with respect to software products distributed by SAMSUNG under the SAMSUNG brand name are set forth in the applicable end user license agreement. Non-SAMSUNG hardware and software products, if provided, are on an "AS IS" basis. Non-SAMSUNG manufacturers, suppliers, publishers, and service providers may provide their own warranties.
This limited warranty covers manufacturing defects in materials and workmanship encountered in normal, and except to the extent otherwise expressly provided for in this statement, noncommercial use of this product, and shall not apply to the following, including, but not limited to: damage which occurs in shipment; delivery and installation; applications and uses for which this product was not intended; altered product or serial numbers; cosmetic damage or exterior finish; accidents, abuse, neglect, fire, water, lightning or other acts of nature; use of products, equipment, systems, utilities, services, parts, supplies, accessories, applications, installations, repairs, external wiring or connectors not supplied and authorized by SAMSUNG, or which damage this product or result in service problems; incorrect electrical line voltage, fluctuations and surges; customer adjustments and failure to follow operating instructions, cleaning, maintenance and environmental instructions that are covered and prescribed in the instruction book; product removal or reinstallation; reception problems and distortion related to noise, echo, interference or other signal transmission and delivery problems. SAMSUNG does not warrant uninterrupted or error-free operation of the product.
THERE ARE NO EXPRESS WARRANTIES OTHER THAN THOSE LISTED AND DESCRIBED ABOVE, AND NO WARRANTIES WHETHER EXPRESS OR IMPLIED, INCLUDING, BUT NOT LIMITED TO, ANY IMPLIED WARRANTIES OF MERCHANTABILITY OR FITNESS FOR A PARTICULAR PURPOSE, SHALL APPLY AFTER THE EXPRESS WARRANTY PERIODS STATED ABOVE, AND NO OTHER EXPRESS WARRANTY OR GUARANTY GIVEN BY ANY PERSON, FIRM OR CORPORATION WITH RESPECT TO THIS PRODUCT SHALL BE BINDING ON SAMSUNG. SAMSUNG SHALL NOT BE LIABLE FOR LOSS OF REVENUE OR PROFITS, FAILURE TO REALIZE SAVINGS OR OTHER BENEFITS, OR ANY OTHER SPECIAL, INCIDENTAL OR CONSEQUENTIAL DAMAGES CAUSED BY THE USE, MISUSE OR INABILITY TO USE THIS PRODUCT, REGARDLESS OF THE LEGAL THEORY ON WHICH THE CLAIM IS BASED, AND EVEN IF SAMSUNG HAS BEEN ADVISED OF THE POSSIBILITY OF SUCH DAMAGES. NOR SHALL RECOVERY OF ANY KIND AGAINST SAMSUNG BE GREATER IN AMOUNT THAN THE PURCHASE PRICE OF THE PRODUCT SOLD BY SAMSUNG AND CAUSING THE ALLEGED DAMAGE. WITHOUT LIMITING THE FOREGOING, PURCHASER ASSUMES ALL RISK AND LIABILITY FOR LOSS, DAMAGE OR INJURY TO PURCHASER AND PURCHASER'S PROPERTY AND TO OTHERS AND THEIR PROPERTY ARISING OUT OF THE USE, MISUSE OR INABILITY TO USE THIS PRODUCT SOLD BY SAMSUNG NOT CAUSED DIRECTLY BY THE NEGLIGENCE OF SAMSUNG. THIS LIMITED WARRANTY SHALL NOT EXTEND TO ANYONE OTHER THAN THE ORIGINAL PURCHASER OF THIS PRODUCT, IS NONTRANSFERABLE AND STATES YOUR EXCLUSIVE REMEDY.
Some states do not allow limitations on how long an implied warranty lasts, or the exclusion or limitation of incidental or consequential damages, so the above limitations or exclusions may not apply to you. This warranty gives you specific legal rights, and you may also have other rights which vary from state to state.
To obtain warranty service, please contact SAMSUNG customer care center.
The benefits of this Limited Warranty extend only to the original purchaser of Samsung products from an authorized Samsung reseller. THIS LIMITED WARRANTY SHALL NOT APPLY TO ANY SAMSUNG PRODUCTS PURCHASED FROM UNAUTHORIZED RESELLERS OR RETAILERS, EXCEPT IN STATES WHERE SUCH RESTRICTION MAY BE PROHIBITED. For a list of Samsung authorized retailers, please go to: http://www.samsung.com/us/peaceofmind/ authorized_resellers.html.

Certification model only
The party responsible for product compliance:
Samsung Electronics Co., LTD.
America QA lab of Samsung
19 Chapin Rd. Building D,
Pine Brook, New Jersey 07058
Questions or Comments?
| AREA | CALL | OR VISIT US ONLINE AT | WRITE |
| IN THE US | 1-800-SAMSUNG (726-7864) | www.samsung.com/us/support | Samsung Electronics America, Inc. 85 Challenger Road Ridgefield Park, NJ 07660 |

© 2016 Samsung Electronics Co., Ltd. All rights reserved.